All Products
-
Audio Sellerz Red Tee
Vendor:Audio SellerzRegular price From $15.00 USDRegular price -
Sky High Car Audio CCA 1/0 Gauge - 50ft Spool
Vendor:Sky High Car AudioRegular price $70.00 USDRegular price -
Audio Sellerz Blue Tee
Vendor:Audio SellerzRegular price From $15.00 USDRegular price -
Sky High Car Audio ANL Fuse
Vendor:Sky High Car AudioRegular price $4.00 USDRegular price -
Sky High Car Audio OFC 1/0 Gauge - 50ft
Vendor:Sky High Car AudioRegular price $329.95 USDRegular price -
Audio Sellerz Merica Tee
Vendor:Audio SellerzRegular price From $15.00 USDRegular price -
2016-2024 Honda Civic 1.5L 2.0L 180-300 Amp Brand X High Output Alternator
Vendor:Brand XRegular price From $319.00 USDRegular price -
Audio Sellerz All White Tee
Vendor:Audio SellerzRegular price From $15.00 USDRegular price -
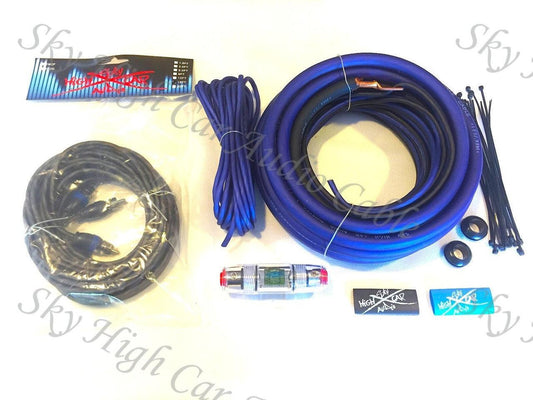
Sky High Car Audio 4 OFC Amp Kit
Vendor:Sky High Car AudioRegular price $84.95 USDRegular price -
Audio Sellerz Green Tee
Vendor:Audio SellerzRegular price From $15.00 USDRegular price -

 Sold out
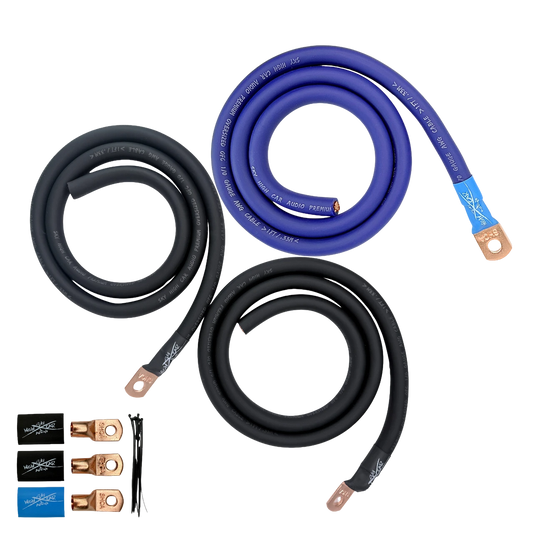
Sky High Car Audio 1/0 OFC Big 3
Vendor:Sky High Car AudioRegular price $96.95 USDRegular price -
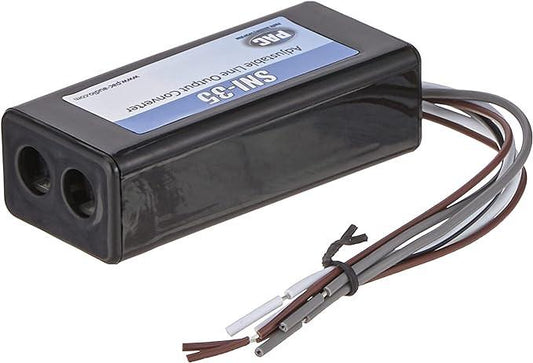
PAC SNI-35 Variable LOC Line Out Converter
Vendor:PacRegular price $14.99 USDRegular price -
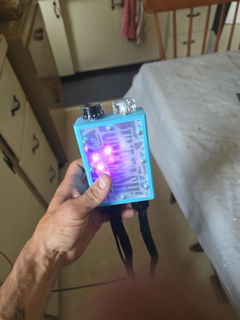
Sky High Car Audio Flush Mount Bass knob
Vendor:Sky High Car AudioRegular price $14.99 USDRegular price -
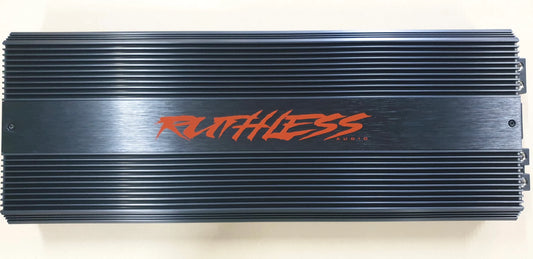
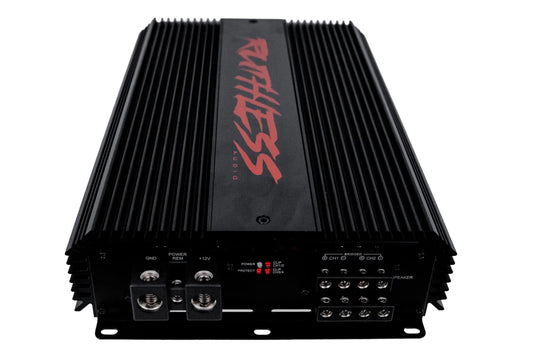
Ruthless Audio 4500.1 – 4500W Monoblock Competition Car Audio Amplifier
Vendor:Ruthless AudioRegular price $829.99 USDRegular price -
Sky High Car Audio E-Series 1/0 CCA Big 3 Upgrade Kit
Vendor:Sky High Car AudioRegular price $32.95 USDRegular price -
Ruthless Audio 10000.1 – 10K Mono Block Competition Car Audio Amplifier
Vendor:Ruthless AudioRegular price $1,599.99 USDRegular price -
Ruthless Audio 1500.4 – 4-Channel 1500W Full-Range Car Audio Amplifier
Vendor:Ruthless AudioRegular price $479.99 USDRegular price -
Custom Powder Coat for Brand X High Output Alternators
Vendor:Brand XRegular price From $45.00 USDRegular price -
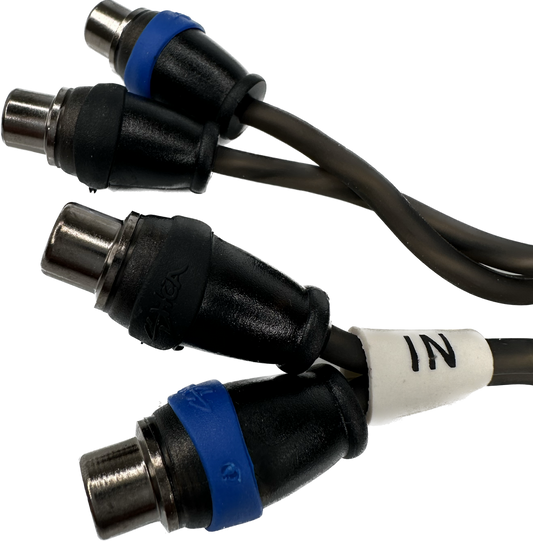
Sky High Car Audio Twisted 2-Channel Twisted RCA 1.5ft-20ft
Vendor:Sky High Car AudioRegular price From $9.95 USDRegular price -
2019-2026 Nissan Sentra Altima Versa Note 1.6L 2.0L 2.5L 200-325 Amp LIN Single Wire Control Brand X High Output Alternator
Vendor:Brand XRegular price From $305.00 USDRegular price -
2018-2024 Toyota Camry RAV4 Corolla 2.0L 2.5L 150-320 Amp Plug and Play Brand X High Output Alternator
Vendor:Brand XRegular price From $319.00 USDRegular price -
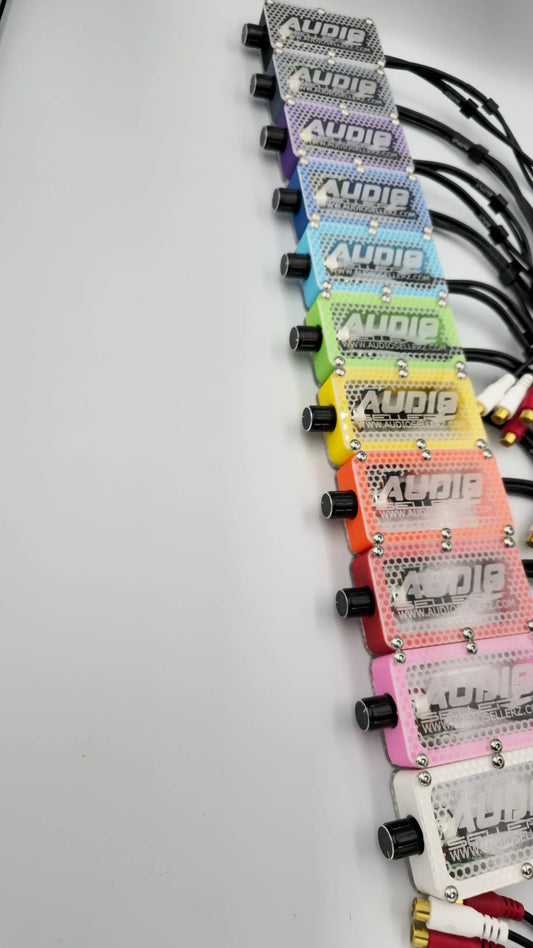
Audio Sellerz Economy Bass Knob Single
Vendor:Audio SellerzRegular price $50.00 USDRegular price -
Advanced Electric KILO HP40 40Ah Sodium-Ion Car Audio Battery
Vendor:Advanced ElectricRegular price $749.99 USDRegular price$944.99 USDSale price $749.99 USDSale -
Audio Sellerz Purple Tee
Vendor:Audio SellerzRegular price From $15.00 USDRegular price -
Audio Sellerz F**K The Haters Tee
Vendor:Audio SellerzRegular price From $20.00 USDRegular price -
Audio Sellerz Pink Tee
Vendor:Audio SellerzRegular price From $15.00 USDRegular price -
Audio Sellerz Economy Single Fuse Block
Vendor:Audio SellerzRegular price $15.00 USDRegular price -
1996-2011 Subaru 2.0L 2.5L 3.0L 3.6L Brand X High Output Alternator
Vendor:Brand XRegular price From $365.00 USDRegular price -
Sky High Car Audio 1/0 OFC Amp Kit
Vendor:Sky High Car AudioRegular price $163.95 USDRegular price -
2004-2010 Toyota Camry RAV4 Scion xB tC 2.4L 200-350 Amp Brand X High Output Alternator
Vendor:Brand XRegular price From $305.00 USDRegular price -
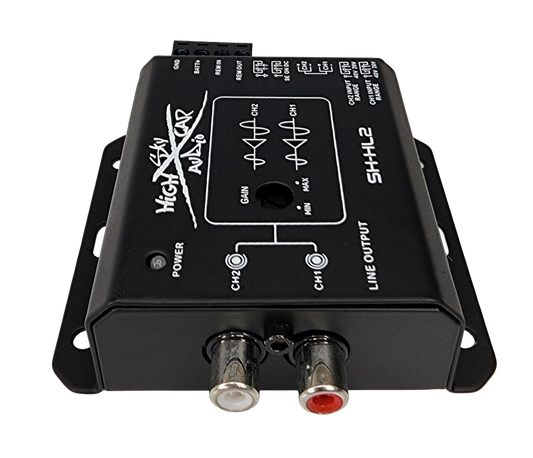
Sky High Car Audio HL 2 -2 Channel Hi To Low Converter
Vendor:Sky High Car AudioRegular price $56.95 USDRegular price -
Sky High Car Audio BL65.3 6.5" Coaxial 3 Ohm Speakers Pair
Vendor:Sky High Car AudioRegular price $43.95 USDRegular price -
Ruthless Audio 800.4 – 4-Channel 800W RMS Full-Range Car Audio Amplifier
Vendor:Ruthless AudioRegular price $289.99 USDRegular price -
1992-2001 Dodge Ram Dakota Durango Jeep Cherokee XJ Grand Cherokee ZJ Wrangler YJ TJ Chrysler 3.9L 4.0L 5.2L 5.9L 200-400 Amp Brand X High Output Alternator
Vendor:Brand XRegular price From $305.00 USDRegular price -
1997-2001 Toyota Camry Solara 2.2L 200-350 Amp Alternator Brand X High Output Alternator
Vendor:Brand XRegular price From $305.00 USDRegular price -
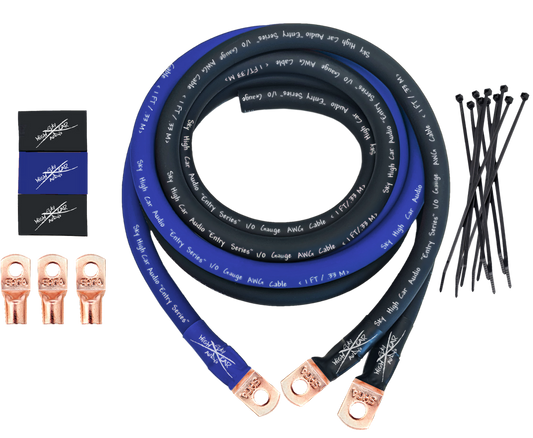
Sky High Car Audio 1/0 CCA Big 3
Vendor:Sky High Car AudioRegular price $38.95 USDRegular price






































-
 Audio Sellerz Red TeeThe 100% cotton unisex classic tee will help you land a more structured look. It sits nicely, maintains sharp lines a...$15.00
 -
 Sky High Car Audio CCA 1/0 Gauge - 50ft SpoolSky High Car Audio 1/0 Gauge CCA Power/Ground Wire (50ft Spool)Sold by Audiosellerz.com Product DescriptionUpgrade yo...$70.00
 -
 Audio Sellerz Blue TeeThe 100% cotton unisex classic tee will help you land a more structured look. It sits nicely, maintains sharp lines a...$15.00
 -
 Sky High Car Audio ANL FuseSky High Car Audio ANL FuseSold by Audiosellerz.com Ensure the safety and performance of your car audio system with t...$4.00
 -
 Sky High Car Audio OFC 1/0 Gauge - 50ftSky High Car Audio True AWG 1/0 Gauge OFC Power or Ground Wire Sold by AudioSellerz.com Premium Performance for Power...$329.95
 -
 Audio Sellerz Merica TeeThe 100% cotton unisex classic tee will help you land a more structured look. It sits nicely, maintains sharp lines a...$15.00
 -
 2016-2024 Honda Civic 1.5L 2.0L 180-300 Amp Brand X High Output Alternator2016-2024 Honda Civic 1.5L 2.0L 180-300 Amp Brand X High Output Alternator Sold by AudioSellerz.com Important Before ...$319.00
 -
 Audio Sellerz All White TeeThe 100% cotton unisex classic tee will help you land a more structured look. It sits nicely, maintains sharp lines a...$15.00
 -
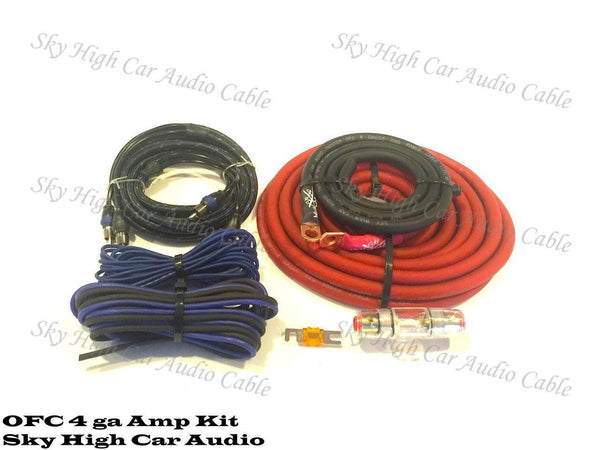 Sky High Car Audio 4 OFC Amp KitSky High Car Audio 4 OFC Amp Kit Sold by AudioSellerz.com The Sky High Car Audio 4 Gauge OFC Amplifier Installation K...$84.95
 -
 Audio Sellerz Green TeeThe 100% cotton unisex classic tee will help you land a more structured look. It sits nicely, maintains sharp lines a...$15.00
 -
 Sky High Car Audio 1/0 OFC Big 3Sky High Car Audio 1/0 Gauge OFC Big 3 Upgrade Kit Sold by AudioSellerz.com The Sky High Car Audio 1/0 Gauge OFC Big ...$96.95
 -
 PAC SNI-35 Variable LOC Line Out ConverterADJUSTABLE LINE OUTPUT CONVERTER 50 WATTS MAXIMUM INPUT PER CHANNEL LINEAR 20 TO 20,000HZ OUTPUT BASED ON INP...$14.99
 -
 Sky High Car Audio Flush Mount Bass knobSky High Car Audio Flush Mount Bass Knob Sold by AudioSellerz.com Stylish and Precise Bass Control The Sky High Car A...$14.99
 -
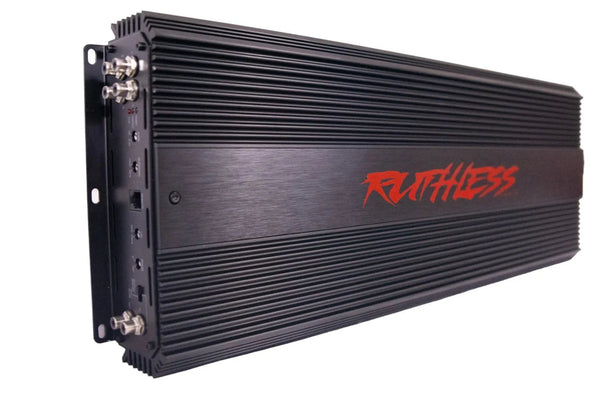 Ruthless Audio 4500.1 – 4500W Monoblock Competition Car Audio AmplifierRuthless Audio 4500.1 – 4500W Monoblock Competition Car Audio Amplifier Sold by AudioSellerz.com The Ruthless Audio ...$829.99
 -
 Sky High Car Audio E-Series 1/0 CCA Big 3 Upgrade KitSky High Car Audio E-Series 1/0 CCA Big 3 Upgrade Kit Sold by AudioSellerz.com The Sky High Car Audio E-Series 1/0 CC...$32.95
 -
 Ruthless Audio 10000.1 – 10K Mono Block Competition Car Audio AmplifierRuthless Audio 10000.1 – 10K Mono Block Competition Car Audio Amplifier Sold by AudioSellerz.com The Ruthless Audio ...$1,599.99
 -
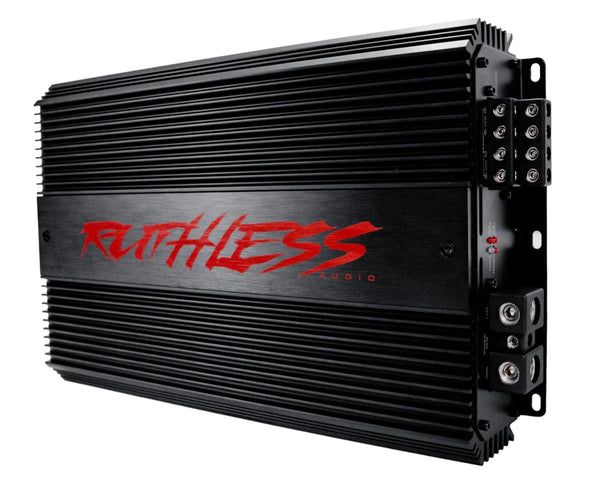 Ruthless Audio 1500.4 – 4-Channel 1500W Full-Range Car Audio AmplifierRuthless Audio 1500.4 – 4-Channel 1500W Full-Range Car Audio Amplifier Sold by AudioSellerz.com The Ruthless Audio 1...$479.99
 -
 Custom Powder Coat for Brand X High Output AlternatorsCustom Powder Coat for Brand X High Output Alternators Sold by AudioSellerz.com Give your new Brand X high output alt...$45.00
 -
 Sky High Car Audio Twisted 2-Channel Twisted RCA 1.5ft-20ftPremium RCA Cable for Audio Installations Sold by Audiosellerz.com Enhance your audio setup with our Premium RCA Cabl...$9.95
 -
 2019-2026 Nissan Sentra Altima Versa Note 1.6L 2.0L 2.5L 200-325 Amp LIN Single Wire Control Brand X High Output Alternator2019-2026 Nissan Sentra Altima Versa Note 1.6L 2.0L 2.5L 200-325 Amp LIN Single Wire Control Brand X High Output Alte...$305.00
 -
 2018-2024 Toyota Camry RAV4 Corolla 2.0L 2.5L 150-320 Amp Plug and Play Brand X High Output Alternator2018-2024 Toyota Camry RAV4 Corolla 2.0L 2.5L 150-320 Amp Plug and Play Brand X High Output Alternator Sold by AudioS...$319.00
 -
 Audio Sellerz Economy Bass Knob SingleThese beautiful bass knobs are made in house at Audio Sellerz. Our goal was to make a production bass knob that was s...$50.00
 -
 Advanced Electric KILO HP40 40Ah Sodium-Ion Car Audio BatteryAdvanced Electric KILO HP40 40Ah Sodium-Ion Car Audio Battery Sold by AudioSellerz.com The Advanced Electric KILO HP4...$749.99
$944.99 -
 Audio Sellerz Purple TeeThe 100% cotton unisex classic tee will help you land a more structured look. It sits nicely, maintains sharp lines a...$15.00
 -
 Audio Sellerz F**K The Haters TeeThe 100% cotton unisex classic tee will help you land a more structured look. It sits nicely, maintains sharp lines a...$20.00
 -
 Audio Sellerz Pink TeeThe 100% cotton unisex classic tee will help you land a more structured look. It sits nicely, maintains sharp lines a...$15.00
 -
 Audio Sellerz Economy Single Fuse BlockAudio Sellerz Economy Single Fuse Block Sold by AudioSellerz.com, the Audio Sellerz Economy Single Fuse Block is a cl...$15.00
 -
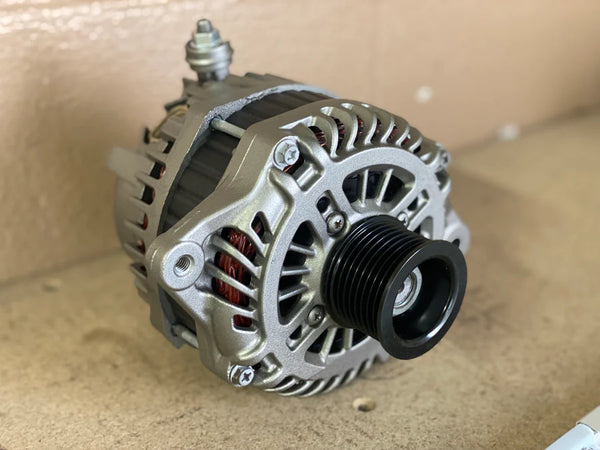 1996-2011 Subaru 2.0L 2.5L 3.0L 3.6L Brand X High Output Alternator1996-2011 Subaru 2.0L 2.5L 3.0L 3.6L Brand X High Output Alternator 1996-2011 Subaru 2.0L 2.5L 3.0L 3.6L Brand X Hig...$365.00
 -
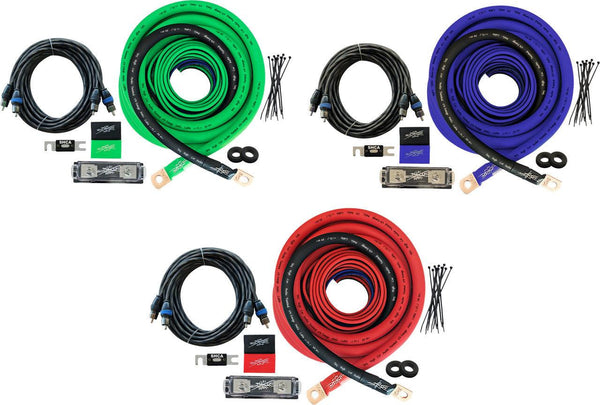 Sky High Car Audio 1/0 OFC Amp KitSky High Car Audio 1/0 OFC Amp Kit Sold by AudioSellerz.com The Sky High Car Audio 1/0 Gauge OFC Amplifier Installati...$163.95
 -
 2004-2010 Toyota Camry RAV4 Scion xB tC 2.4L 200-350 Amp Brand X High Output Alternator2004-2010 Toyota Camry RAV4 Scion xB tC 2.4L 200-350 Amp Brand X High Output Alternator Sold by AudioSellerz.com Impo...$305.00
 -
 Sky High Car Audio HL 2 -2 Channel Hi To Low ConverterSky High Car Audio SH-HL2 2-Channel Hi-Lo Converter Sold by AudioSellerz.com Seamless Integration for Aftermarket ...$56.95
 -
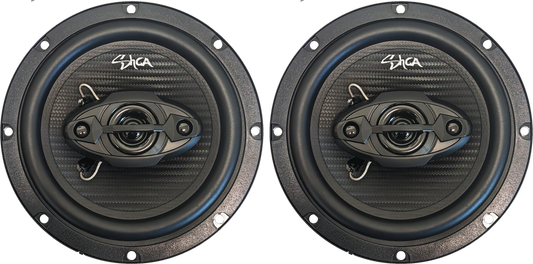
 Sky High Car Audio BL65.3 6.5" Coaxial 3 Ohm Speakers PairSky High Car Audio BL65.3 6.5" Coaxial 3 Ohm Speakers PairSold by AudioSellerz.com. The Sky High Car Audio BL65.3 6.5...$43.95
 -
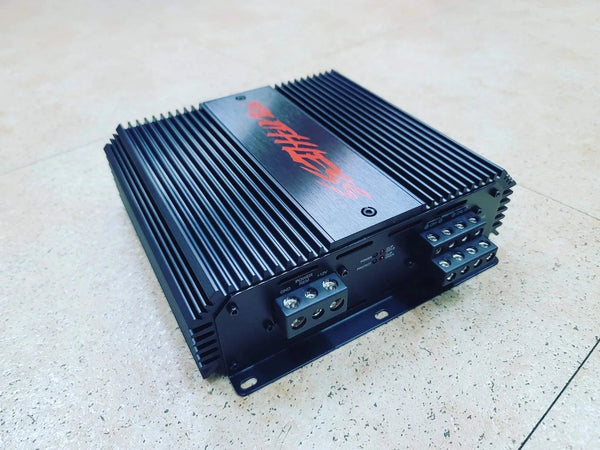 Ruthless Audio 800.4 – 4-Channel 800W RMS Full-Range Car Audio AmplifierRuthless Audio 800.4 – 4-Channel 800W RMS Full-Range Car Audio Amplifier Sold by AudioSellerz.com The Ruthless Audio...$289.99
 -
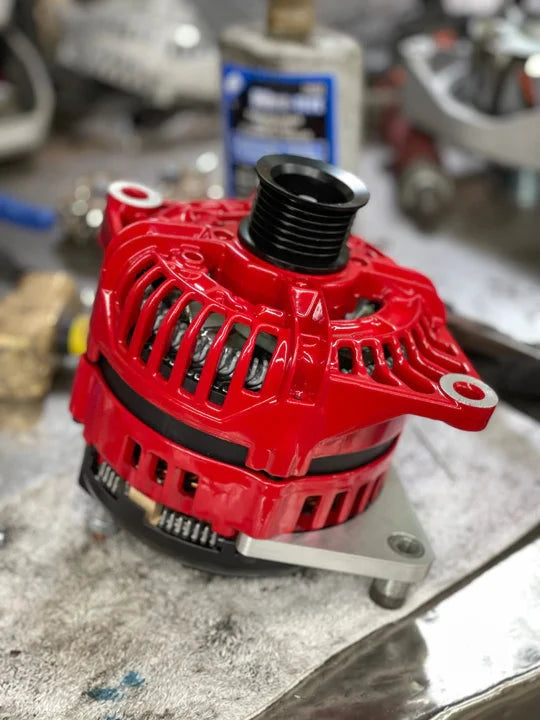 1992-2001 Dodge Ram Dakota Durango Jeep Cherokee XJ Grand Cherokee ZJ Wrangler YJ TJ Chrysler 3.9L 4.0L 5.2L 5.9L 200-400 Amp Brand X High Output Alternator1992-2001 Dodge Ram Dakota Durango Jeep Cherokee XJ Grand Cherokee ZJ Wrangler YJ TJ Chrysler 3.9L 4.0L 5.2L 5.9L 200...$305.00
 -
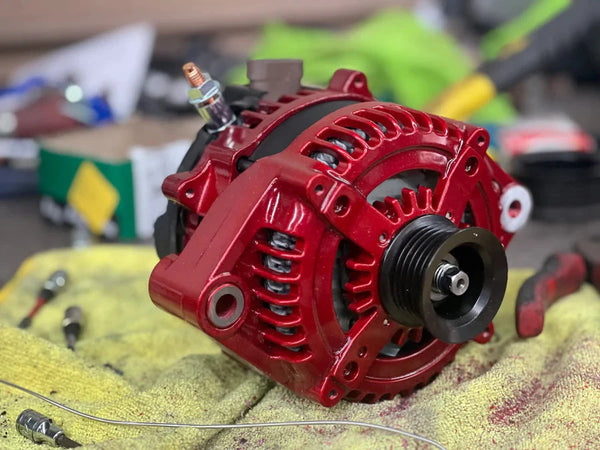 1997-2001 Toyota Camry Solara 2.2L 200-350 Amp Alternator Brand X High Output Alternator1997-2001 Toyota Camry Solara 2.2L 200-350 Amp Brand X High Output Alternator 1997-2001 Toyota Camry Solara 2.2L 200-...$305.00
 -
 Sky High Car Audio 1/0 CCA Big 3Sky High Car Audio 1/0 Gauge CCA Big 3 Upgrade Kit Sold by AudioSellerz.com The Sky High Car Audio 1/0 Gauge CCA Big ...$38.95
 -


Sky High Car Audio Big 3 Upgrade Kits
Sold by AudioSellerz.com
Sky High Car Audio Big 3 upgrade kits help strengthen three of the most important charging and grounding paths under the hood.
If you are adding amplifier power, building a stronger subwoofer system, installing a high-output alternator, upgrading battery support or dealing with old factory grounds, the Big 3 upgrade is one of the first electrical improvements worth considering.
The three common Big 3 connections are:
- Alternator positive to battery positive
- Battery negative to chassis ground
- Engine block to chassis ground
These connections help current move between the alternator, battery, engine and vehicle chassis. When those paths are small, damaged, corroded or poorly connected, they can become weak points as the car audio system demands more current.
Sky High Big 3 kits are available in different wire sizes and materials, including:
- 4 gauge OFC Big 3 kits
- 1/0 gauge OFC Big 3 kits
- 4 gauge CCA Big 3 kits
- 1/0 gauge CCA Big 3 kits
The correct kit depends on the amplifier system, alternator output, vehicle layout, wire length, available connection points and whether future upgrades are planned.
Browse the kits on this page, compare additional Sky High Car Audio power and ground wire, complete the amplifier installation with a Sky High amplifier wiring kit or shop high-output car audio alternators when the charging system needs more output.
Important: A Big 3 kit strengthens electrical paths. It does not create alternator output, repair a failed battery, correct an unsafe amplifier load or replace properly sized amplifier wiring.
What Is a Big 3 Upgrade?
A Big 3 upgrade adds or upgrades the primary charging and grounding cables under the hood.
Factory wiring is designed around the original vehicle equipment. It was not necessarily selected to support large aftermarket amplifiers, additional batteries, high-output alternators or serious bass systems.
As electrical demand increases, small or deteriorated factory wiring can contribute to unnecessary resistance and voltage loss.
The Big 3 upgrade addresses three major paths:
1. Alternator Positive to Battery Positive
This connection helps carry charging current from the alternator toward the battery and electrical system.
When adding this cable, the installation must account for:
- Alternator output-terminal location
- Battery positive-terminal location
- Wire length
- Heat from the engine and exhaust
- Belts, pulleys and fans
- Sharp metal edges
- Proper terminals and strain relief
- Fuse protection when required by the installation design
2. Battery Negative to Chassis Ground
This connection strengthens the path between the battery negative terminal and the vehicle chassis.
The chassis is used as part of the electrical return path throughout the vehicle. A weak battery-to-chassis connection can affect more than the amplifier system.
3. Engine Block to Chassis Ground
The alternator is mounted to the engine, so the engine-to-chassis ground path is an important part of the charging circuit.
Old, small or corroded factory ground straps can create resistance between the engine, chassis and battery.
The exact connection points vary by vehicle. The three upgraded paths remain the same, but the safest routing and hardware depend on the engine bay.
Why Upgrade to a Sky High Big 3 Kit?
A Big 3 kit helps create a stronger electrical foundation before more current is demanded from the vehicle.
It may help improve:
- Alternator-to-battery current flow
- Battery grounding
- Engine grounding
- Voltage consistency
- Support for aftermarket amplifiers
- Support for additional batteries
- Support for high-output alternators
- Under-hood wiring quality
- Reliability of the electrical connections
The Big 3 upgrade does not directly make an amplifier produce power. It helps reduce unnecessary restrictions in important parts of the charging and grounding system.
If the original cables were already large, clean and properly connected, the improvement may be smaller. If the factory paths are undersized, damaged or corroded, upgrading them may make a much more noticeable difference.
When Should You Install a Big 3 Kit?
You do not need to wait for the system to fail before upgrading the wiring.
A Big 3 kit is worth considering when:
- You are adding a monoblock subwoofer amplifier
- You are adding a 4-channel amplifier
- You are installing multiple amplifiers
- You are upgrading to 1/0 gauge amplifier power wire
- You are adding one or more subwoofers
- You are installing a high-output alternator
- You are adding another battery
- The vehicle has old or corroded ground straps
- Voltage falls when the system plays
- The headlights dim heavily with the bass
- The amplifier enters protect mode under load
- You are preparing for future car audio upgrades
A smaller daily-driver system may not require the same Big 3 wiring as a large multi-amplifier build. The upgrade should match the current system and future plan.
Sky High Big 3 Kits for Daily Drivers
A Big 3 upgrade is not only for competition vehicles.
Daily drivers can benefit when they have:
- A subwoofer amplifier
- An amplified speaker system
- Older factory grounds
- A replacement or upgraded alternator
- A battery upgrade
- Plans for additional amplifier power later
A practical daily-driver Big 3 upgrade can strengthen the under-hood wiring without turning the vehicle into an extreme electrical build.
The correct daily setup should prioritize:
- Safe routing
- Secure connections
- Correct wire size
- Protection from engine heat
- Dependable grounds
- Easy future service
Completing the Big 3 early can also make later amplifier, battery and alternator upgrades easier because the primary wiring paths have already been addressed.
Sky High Big 3 Kits for Subwoofer Systems
Subwoofer amplifiers can place a major load on a vehicle’s electrical system.
When the bass hits, the amplifier may demand much more current than it uses during quiet parts of the music. Weak charging or grounding paths can contribute to voltage drop, heat and inconsistent output.
A Sky High Big 3 kit is especially worth considering when:
- You are installing a larger monoblock amplifier
- You are upgrading from a basic subwoofer system
- You are adding multiple subwoofers
- You are using 1/0 gauge amplifier wiring
- The lights dim during bass notes
- The amplifier shuts down when played hard
- You are adding battery support
- You are upgrading the alternator
The Big 3 is only one part of a strong bass system.
The subwoofers, enclosure, amplifier, final impedance, amp kit, grounds, battery and alternator must all support the same power goal.
Browse Sky High Car Audio subwoofers and Sky High Car Audio amplifiers when planning a complete matching system.
Sky High Big 3 Kits for Multiple-Amplifier Systems
A system using separate amplifiers for the subwoofers and speakers can draw substantially more current than a single small amplifier.
A multi-amplifier build may need:
- A Big 3 upgrade
- Larger main power wire
- Fused power distribution
- Ground-distribution hardware
- Additional battery support
- A high-output alternator
- Multiple power-wire runs
- Voltage monitoring
Do not treat each amplifier as an isolated installation. The combined current demand determines how much work the charging system, batteries, wiring and grounds must perform.
Use the complete car audio wiring-diagram guide when planning the radio, signal wiring, amplifiers, distribution, grounds and speakers.
Sky High Big 3 Kits for High-Output Alternators
A high-output alternator can increase charging capability, but the alternator still needs wiring capable of carrying current into the electrical system.
Installing a high-output alternator while relying only on small, old or damaged factory cables can leave unnecessary restrictions in place.
When installing a high-output alternator, plan:
- The alternator’s rated output
- The recommended charging cable size
- Battery capacity and chemistry
- Battery-to-chassis grounding
- Engine-to-chassis grounding
- Alternator-to-battery routing
- Positive-cable protection
- Safe terminal clearance
- Protection from belts and heat
The Big 3 wiring should be selected around the alternator and total system demand—not only the amplifier wattage.
Browse high-output alternators for car audio when the factory charging system can no longer recover from the amplifier load.
Does a Big 3 Kit Fix Voltage Drop?
A Big 3 upgrade can help when voltage loss is being caused or increased by weak factory charging cables, poor grounds or high-resistance connections.
It is not a guaranteed solution for every voltage problem.
Voltage drop can also be caused by:
- An alternator that cannot supply enough current
- A weak or damaged battery
- Incorrect charging voltage
- Undersized amplifier power wire
- A poor amplifier ground
- A hot or damaged fuse holder
- Loose battery terminals
- Unsafe amplifier impedance
- Excessive amplifier gain or clipping
- More total amplifier demand than the electrical system can support
If voltage still drops after the Big 3 upgrade, test the complete system instead of continuing to add wire randomly.
Check:
- Voltage at the alternator
- Voltage at the battery
- Voltage at the amplifier
- Voltage loss across the power cable
- Voltage loss across the ground path
- Battery condition
- Alternator output
- Connection temperature
- Amplifier current demand
Will a Big 3 Kit Stop Headlight Dimming?
It may help when dimming is caused by resistance in the factory charging and grounding paths.
Headlight dimming can also indicate that the amplifier is demanding current faster than the alternator and battery can supply it.
If dimming remains after the Big 3 upgrade, the system may also need:
- A healthier or larger battery
- Additional battery support
- A high-output alternator
- Properly sized amplifier wiring
- A better amplifier ground
- Lower electrical demand
- Correct amplifier tuning
Do not treat dimming lights as only a cosmetic issue. It is a visible sign that voltage is changing under load.
Big 3 Upgrade vs High-Output Alternator
A Big 3 kit and a high-output alternator solve different problems.
A Big 3 Kit:
- Strengthens the main charging and grounding paths
- Helps reduce resistance in important cables and connections
- Does not create additional alternator output
A High-Output Alternator:
- Increases available charging output
- Helps replace the energy being consumed by the electrical system
- Still needs properly sized wiring and grounds
A large system may need both.
If the alternator can make enough current but the wiring is restrictive, the cables can hold the system back. If the wiring is excellent but the alternator cannot produce enough current, the battery voltage will still fall over time.
The step-by-step car audio electrical-upgrade guide explains how the Big 3, battery and alternator upgrades fit together.
Big 3 Upgrade vs Battery Upgrade
A Big 3 kit strengthens the wiring paths. A battery stores electrical energy and helps support changing current demand.
A larger or additional battery may help with:
- Short bursts of amplifier demand
- Voltage support
- Playing with the engine off for limited periods
- Larger amplifier systems
- Systems where reserve capacity needs to be increased
A battery cannot correct:
- A weak alternator-to-battery cable
- A poor engine ground
- A bad amplifier ground
- A melted fuse holder
- Undersized amplifier wire
The battery and wiring need to work together.
Systems needing stronger battery support can compare Advanced Electric car audio batteries.
Big 3 Kit vs Amplifier Wiring Kit
A Big 3 kit and an amp kit are not the same product.
A Big 3 Kit Works Under the Hood
It upgrades the major alternator, battery, chassis and engine wiring paths.
An Amplifier Wiring Kit Connects the Amplifier
An amp kit normally includes the main power and ground wiring, fuse protection, signal wiring and supporting hardware needed for an amplifier installation.
Many systems need both.
A Big 3 kit cannot replace the main power cable running from the battery to the amplifier. An amp kit cannot replace weak engine and charging-system grounds.
Browse Sky High Car Audio amp kits when wiring the amplifier itself.
4 Gauge vs 1/0 Gauge Big 3 Kits
Wire size affects how much current a cable can support with an acceptable amount of voltage loss.
The correct Big 3 wire size depends on:
- Alternator output
- Total amplifier demand
- Wire material
- Cable length
- Available terminal space
- Vehicle layout
- Future upgrades
Consider a 4 Gauge Big 3 Kit When:
- The system has moderate current demand
- The vehicle uses a factory or modest alternator
- The cable runs are relatively short
- The build is a smaller daily-driver upgrade
- The kit material and current capacity fit the system
Consider a 1/0 Gauge Big 3 Kit When:
- You are installing a larger monoblock amplifier
- The system uses multiple amplifiers
- You are adding a high-output alternator
- You are adding battery support
- The system may grow later
- You want a stronger under-hood foundation
One/zero gauge is not automatically required for every vehicle, and it is not automatically enough for every extreme build. Large alternators and very high-current systems may require multiple cables or a custom wiring design.
Browse additional 1/0 and 0 gauge car audio wire when the installation needs extra power or ground cable.
Sky High 4 Gauge OFC Big 3 Upgrade Kit
The Sky High Car Audio 4 Gauge OFC Big 3 Upgrade Kit gives daily-driver and moderate electrical builds a copper-wire option for strengthening the main charging and grounding connections.
It may fit:
- Moderate amplifier systems
- Daily drivers with upgraded audio
- Vehicles with aging factory grounds
- Customers who want OFC wiring without moving immediately to 1/0 gauge
- Shorter under-hood cable paths where 4 gauge fits the current demand
Always review the individual product listing and measure the vehicle before ordering.
Sky High 1/0 Gauge OFC Big 3 Upgrade Kit
The Sky High Car Audio 1/0 Gauge OFC Big 3 Upgrade Kit is the stronger direction for higher-current builds, upgraded alternators and systems that need more cable capacity.
It may fit:
- Larger monoblock amplifier systems
- Multiple-amplifier builds
- High-output alternator installations
- Additional battery systems
- Loud daily-driver systems
- Customers preparing the vehicle for future upgrades
Make sure the battery terminals, alternator stud and chosen ground locations can accept the included cable and terminal arrangement safely.
Sky High E-Series 4 Gauge CCA Big 3 Kit
The Sky High Car Audio E-Series 4 Gauge CCA Big 3 Upgrade Kit provides a more budget-focused option for smaller daily-driver electrical upgrades.
It may fit:
- Entry-level amplifier systems
- Smaller daily-driver bass builds
- Customers improving weak factory wiring on a limited budget
- Moderate electrical demand
- Vehicles that are not expected to become high-current builds
CCA should not be treated as electrically identical to OFC of the same gauge. Match the cable to the actual current demand, length and system goal.
Sky High 1/0 Gauge CCA Big 3 Upgrade Kit
The Sky High Car Audio 1/0 Gauge CCA Big 3 Upgrade Kit gives customers a larger CCA option for systems that need more conductor size while remaining within a more budget-conscious wiring plan.
It may fit:
- Moderate daily-driver amplifier systems
- Customers stepping up from small factory wiring
- Longer or higher-demand installations where 4 gauge CCA is not suitable
- Systems where the material and cable capacity have been intentionally planned
For high-output alternators and serious amplifier systems, OFC is normally the stronger long-term direction.
OFC vs CCA for Big 3 Upgrades
OFC and CCA are different conductor materials.
OFC Wire
OFC stands for oxygen-free copper.
It is generally the stronger choice when:
- Current demand is high
- A high-output alternator is being installed
- The system uses large amplifiers
- Voltage stability is a priority
- The vehicle may receive future upgrades
- You want greater capacity from a given conductor size
CCA Wire
CCA stands for copper-clad aluminum.
It can fit:
- Smaller daily-driver systems
- Moderate current demand
- Budget-focused electrical upgrades
- Installations where the cable is intentionally sized for CCA
Do not compare OFC and CCA only by the gauge printed on the jacket. Conductor material, actual size, cable length and connection quality all affect the result.
The car audio wire-gauge and fuse guide explains the difference between wire sizes, materials, current demand and cable length in more detail.
What Comes With a Sky High Big 3 Kit?
The exact contents vary by product, wire size and version. Review the individual product page before ordering.
A Big 3 kit may include:
- Alternator-positive cable
- Battery-to-chassis ground cable
- Engine-to-chassis ground cable
- Crimped ring terminals or lugs
- Heat shrink
- Connection hardware
The vehicle may still require:
- Additional wire length
- Different terminal sizes
- Battery-terminal adapters
- Alternator-stud hardware
- Fuse protection
- Protective loom
- Grommets
- Extra heat shielding
- Additional ground cables
Never assume a universal kit will fit every engine bay without measuring and planning the route.
Should You Remove the Factory Wiring?
In many Big 3 installations, the upgraded cables are added alongside the factory wiring instead of removing the original cables.
Keeping the factory connections can preserve original vehicle circuits while the larger cable adds another lower-resistance path.
The correct method depends on:
- Vehicle wiring design
- Alternator configuration
- Battery-terminal layout
- Factory current sensors
- Manufacturer requirements
- The condition of the existing cables
Some newer vehicles use battery-monitoring sensors and computer-controlled charging systems. Do not bypass factory sensors or change grounding paths without understanding how the vehicle monitors current and battery condition.
Does the Alternator Cable Need a Fuse?
Positive cable protection depends on the vehicle, cable route, alternator configuration and complete electrical design.
Consider:
- How close the cable runs to grounded metal
- Whether it passes through or near body panels
- Cable length
- Alternator output
- Battery-bank layout
- Whether the vehicle already uses factory fusible protection
- The recommendations of the alternator and vehicle manufacturers
A short circuit in an unfused battery-connected cable can create severe heat and fire risk.
Use appropriate fuse protection when required by the installation, and never select a fuse only by the amplifier rating. The cable and complete circuit must be protected correctly.
Browse car audio fuse holders and fuse blocks when the electrical design requires additional protection.
Why Grounding Matters
Current must have a dependable return path.
A large positive charging cable paired with weak grounds still creates an unbalanced electrical system.
Weak engine, chassis or battery grounds can contribute to:
- Voltage drop
- Unstable charging
- Amplifier protect mode
- Electrical noise
- Slow cranking
- Hot connection points
- Random electrical problems
- Reduced amplifier output
A strong ground connection should normally be:
- Attached to clean conductive metal
- Secured tightly
- Properly crimped
- Protected from corrosion
- Routed away from heat and moving parts
- Sized for the electrical demand
Read the complete car audio grounding guide for more help finding, preparing and testing ground connections.
Big 3 Installation Planning
The Big 3 concept is simple, but under-hood installation details matter.
Before beginning:
- Identify all three connection points.
- Measure each cable route.
- Check terminal and stud sizes.
- Inspect the factory battery terminals.
- Locate belts, pulleys and cooling fans.
- Identify exhaust and engine heat sources.
- Check for sharp metal edges.
- Determine where the cable will be secured.
- Plan fuse protection when required.
- Confirm whether factory current sensors are present.
Do not cut or route the cable until every connection point has been identified.
Basic Big 3 Installation Order
The exact process varies by vehicle, but a typical installation may involve:
- Turn the vehicle off and remove the key.
- Disconnect the battery safely.
- Identify the alternator positive terminal.
- Identify a dependable battery-to-chassis ground location.
- Identify a dependable engine-to-chassis ground location.
- Measure and prepare each cable.
- Clean ground locations to conductive metal where appropriate.
- Install and tighten the ground connections.
- Route the positive cable safely.
- Add required fuse protection.
- Secure every cable away from heat and moving parts.
- Reconnect the battery.
- Start the vehicle and inspect the connections.
- Measure charging voltage.
- Check the cables and terminals for heat after testing.
Safety warning: Alternator and battery wiring can carry enough current to cause severe heat, burns, equipment damage or fire. Disconnect power before working and use professional installation when you are not experienced with high-current vehicle wiring.
Safe Under-Hood Wire Routing
Under-hood wire must survive heat, vibration, water, chemicals and vehicle movement.
Keep cables away from:
- Belts
- Pulleys
- Cooling fans
- Exhaust manifolds
- Turbocharger components
- Sharp body metal
- Steering components
- Hood hinges
- Areas where the wire can be crushed
Use:
- Protective loom where appropriate
- Heat-resistant protection near hot components
- Grommets where wire passes through metal
- Secure clamps or ties
- Enough slack for normal engine movement
- Strain relief near terminals
Do not allow the wire to hang loose where vibration can move it into a belt or hot surface later.
How to Prepare a Ground Connection
A ground connection must reach conductive metal.
Paint, rust, powder coating, seam sealer, grease and corrosion can increase resistance.
A basic ground-preparation process may include:
- Choose a strong and appropriate connection point.
- Remove coatings from the contact area when necessary.
- Clean the surface.
- Attach the terminal using secure hardware.
- Tighten the connection properly.
- Protect the exposed area against corrosion after the electrical contact is secured.
Do not rely on a loose self-tapping screw in thin sheet metal for a serious high-current connection.
Testing the Big 3 Upgrade
After installation, inspect and test the electrical system.
Check:
- Charging voltage at idle
- Charging voltage with accessories operating
- Battery-terminal tightness
- Alternator-terminal tightness
- Ground-terminal tightness
- Voltage loss across the upgraded paths
- Wire and terminal temperature
- Clearance from moving parts
- Whether the cables shift when the engine moves
A cable that becomes hot may have:
- A weak crimp
- A loose terminal
- Corrosion
- Insufficient conductor size
- Too much current for the connection
Stop and repair hot or discolored connections before playing the system hard.
Common Big 3 Upgrade Mistakes
Using Wire That Is Too Small
Undersized cable can defeat the purpose of upgrading the factory electrical paths.
Choosing CCA as Though It Were OFC
CCA and OFC are different materials. Select the gauge around the conductor and actual current demand.
Using Weak Terminals
Poor-fitting or thin terminals can become hot and loose over time.
Making Poor Crimps
A loose crimp adds resistance and can allow the cable to pull out.
Leaving Paint Under a Ground
Paint can prevent the terminal from making a strong electrical connection.
Using a Weak Ground Location
Not every bolt or piece of sheet metal provides an effective high-current ground path.
Routing Wire Near Belts or Exhaust Heat
Mechanical damage or melted insulation can create a dangerous short circuit.
Leaving Cable Unsecured
Engine vibration can move unsecured wire into sharp, hot or rotating components.
Ignoring Positive-Cable Protection
Added positive cable must be protected according to the vehicle and electrical design.
Removing Factory Wiring Without a Reason
The Big 3 is commonly an addition to the factory paths. Removing original wiring can affect vehicle systems.
Bypassing Factory Battery Sensors
Modern vehicles may use battery-monitoring sensors and computer-controlled charging. Incorrect routing can interfere with those systems.
Expecting the Big 3 to Repair a Failed Alternator
Better wire cannot make a damaged alternator produce correctly.
Expecting the Big 3 to Repair a Bad Battery
A battery that cannot store or deliver energy still needs to be tested and replaced.
Ignoring the Amplifier Wiring
The under-hood wiring can be excellent while the amplifier still suffers from an undersized power cable or poor ground.
Ignoring Final Amplifier Impedance
A Big 3 kit cannot protect an amplifier from a subwoofer or speaker load below its safe rating.
Signs the Big 3 Installation Needs Attention
Inspect the installation when:
- A cable becomes warm or hot
- A terminal changes color
- The wire insulation begins melting
- Charging voltage becomes unstable
- The amplifier continues shutting down
- Electrical noise appears after the installation
- The vehicle cranks slowly
- A ground connection becomes loose
- The wire rubs against metal
- The cable moves near a belt or fan
If the amplifier is entering protect mode, use the amplifier protect-mode troubleshooting guide to check voltage, grounding, impedance, wiring, heat and signal problems.
Sky High Big 3 Kit Buyer Checklist
Before ordering, confirm:
- The vehicle year, make and model
- Alternator location
- Battery location
- Battery-terminal type
- Engine-ground location
- Chassis-ground location
- Required cable lengths
- Required terminal-hole sizes
- Whether 4 gauge or 1/0 gauge fits the system
- Whether OFC or CCA fits the current demand
- Factory or high-output alternator rating
- Total amplifier demand
- Whether additional batteries are installed
- Whether the system may grow later
- Whether positive-cable fusing is required
- Whether additional loom or heat protection is needed
- Whether the vehicle uses battery-monitoring sensors
- Whether professional installation is needed
Choosing the correct kit before beginning the installation can prevent problems with cable length, terminal fitment and wire capacity.
What to Buy With a Sky High Big 3 Kit
A complete electrical upgrade may also need:
- Sky High power and ground wire
- A Sky High amplifier wiring kit
- Fuse holders, fuse blocks and electrical protection
- Battery terminals and adapters
- Ring terminals or copper lugs
- Heat shrink
- Protective wire loom
- Grommets
- Distribution blocks
- Car audio battery support
- A high-output alternator when required
It is better to plan the complete current path once than to replace one weak connection after another.
Why Buy Sky High Big 3 Kits From Audio Sellerz?
Audio Sellerz is a real car audio shop—not simply a website listing random wiring products.
We sell, install and work with amplifiers, subwoofers, wiring, batteries and high-output alternators.
That experience matters because electrical problems are often misdiagnosed as amplifier or subwoofer problems.
Weak wiring and grounds can contribute to:
- Low voltage
- Amplifier heat
- Protect mode
- Weak bass
- Electrical noise
- Hot fuse holders
- Unstable charging
We carry Sky High Big 3 kits for:
- Daily drivers
- Subwoofer systems
- Amplified speaker systems
- Multiple-amplifier builds
- Battery upgrades
- High-output alternator installations
- Vehicles with old or undersized factory wiring
Buying through Audio Sellerz also gives you one place to compare the related Sky High amplifiers, subwoofers, amp kits, bulk wire and electrical-support products needed to finish the system.
Read the complete guide explaining whether you really need the Big 3 upgrade before planning the installation.
Frequently Asked Questions About Sky High Big 3 Kits
What Does a Big 3 Upgrade Do?
It strengthens the alternator-positive, battery-ground and engine-ground wiring paths under the hood.
Do I Need a Big 3 Kit for Car Audio?
It is worth considering when adding amplifier power, subwoofers, battery support or a high-output alternator, especially when the factory wiring is small, old or corroded.
Will a Big 3 Kit Make My System Louder?
It does not create amplifier power directly.
When weak factory wiring is restricting the electrical system, improving those paths may help the equipment operate more consistently.
Will a Big 3 Kit Fix Voltage Drop?
It may help when resistance in the factory charging or ground wiring is part of the problem.
It will not fix an alternator, battery or amplifier system that cannot support the total current demand.
Will a Big 3 Kit Stop Headlight Dimming?
It may reduce dimming caused by weak charging or grounding paths.
Severe dimming can also indicate inadequate alternator output, weak batteries or excessive amplifier demand.
Do I Need a Big 3 Kit With a High-Output Alternator?
Upgraded wiring is strongly worth considering because the charging path and grounds must support the alternator’s increased output.
Is a Big 3 Kit the Same as an Amp Kit?
No. A Big 3 kit upgrades wiring under the hood. An amp kit connects the battery and signal source to the amplifier.
Should I Use 4 Gauge or 1/0 Gauge?
Four gauge may fit smaller or moderate daily-driver systems. One/zero gauge is normally the stronger direction for larger amplifiers, upgraded alternators, additional batteries and future growth.
The correct size depends on current demand, conductor material and cable length.
Should I Use OFC or CCA?
OFC is generally the stronger choice for higher-current systems and high-output alternators.
CCA can fit smaller budget-focused systems when it is sized intentionally for the installation.
Can I Install a Big 3 Kit Myself?
Experienced installers and customers familiar with battery, alternator and high-current wiring may complete the upgrade themselves.
Professional installation is safer when you are not comfortable identifying charging terminals, preparing grounds, crimping cable, selecting protection or routing wire around engine components.
Should I Remove the Factory Wires?
Big 3 cables are commonly added alongside the factory wiring.
Do not remove or bypass factory connections without understanding the vehicle’s electrical system.
Does the Alternator-to-Battery Wire Need a Fuse?
Fuse requirements depend on the vehicle, cable route and electrical design.
Added battery-connected positive cable must be protected correctly against short circuits.
Can the Big 3 Damage My Alternator?
Correctly installed larger wiring does not force the alternator to produce more than the electrical system demands.
Incorrect connections, short circuits, reversed polarity or unsafe installation can damage electrical equipment.
Can I Do More Than Three Wires?
Yes. Some systems add additional engine, chassis, battery and alternator paths beyond the basic three connections.
The additional wiring should be planned around the vehicle and system instead of added randomly.
Do I Need Another Battery?
That depends on amplifier demand, alternator output, playing habits and voltage behavior.
The Big 3 upgrade and battery upgrade solve different parts of the electrical system.
Do I Need a High-Output Alternator?
You may need one when the factory alternator cannot replace the current being consumed by the amplifiers and vehicle.
Monitor voltage and battery recovery while the system is operating.
Why Is My Big 3 Cable Getting Hot?
Possible causes include:
- A loose terminal
- A weak crimp
- Corrosion
- Wire that is too small
- Excessive current
- Poor contact at the alternator, battery or ground
Stop and repair a hot connection before continuing to use the system.
Why Is My Amplifier Still Entering Protect Mode?
Protect mode can also be caused by low voltage, an unsafe speaker load, a poor amplifier ground, shorted speaker wire, overheating, clipping or internal amplifier damage.
Helpful Big 3 and Electrical Guides
- Do you really need the Big 3 upgrade?
- Step-by-step car audio electrical upgrades
- Car audio grounding guide
- Car audio wire-gauge and fuse guide
- Complete car audio wiring-diagram guide
- Amplifier protect-mode troubleshooting guide
Shop Sky High Car Audio Big 3 Kits at Audio Sellerz
Browse this collection for Sky High Car Audio 4 gauge and 1/0 gauge Big 3 upgrade kits in OFC and CCA options.
Whether you are strengthening an older daily driver, adding a subwoofer amplifier, building a multi-amplifier system, upgrading battery support or installing a high-output alternator, choose the kit around the vehicle’s electrical layout and complete current demand.
Dealers, installers and car audio shops interested in Sky High Big 3 kits and other available wholesale product lines can learn more through the Audio Resellerz dealer portal.
Follow Audio Sellerz
Follow Audio Sellerz for Sky High Car Audio wiring, Big 3 upgrades, amplifier installations, battery and alternator upgrades, subwoofer builds, product releases, show coverage and behind-the-scenes content from our team.
Follow Audio Sellerz on Facebook
Follow Audio Sellerz on Instagram